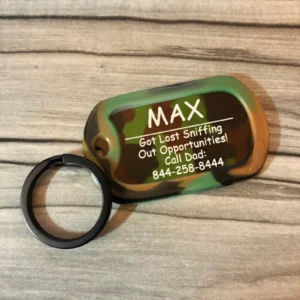
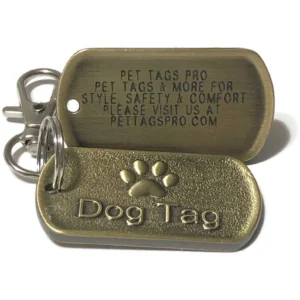
Premium Aluminum Rivet Tag | Custom Personalized Engraving Collar Pet ID Tag | Dog Collar Name Plate | Gunmetal Gray & Black, 3/4″ x 2 3/4″
$9.99
We are committed to delivering fast and reliable service. Our goal is to make your tag within 72 hours. Our work is accurate and our tags are the best quality on the market. We are committed to reliable and friendly customer service.
Please use the space provided to enter your personalized text.
Our solid Aluminum tags will fit up to 4 lines of information with up to 24 characters per line. For larger font size, add less than 4 lines of text.
Our engraving machine can engrave the following characters with Bold or normal font styles:
Letters A – Z (Caps Only)
Numbers 0 – 9
Special Characters / ? . ” , ‘ : ; ! @ # $ % & * – + = < >
Note: Spaces count as characters. Unable to use the underline character.
Read Important information below regarding, “What contact info should I put on my Dog Tags?” And “How to Install the Rivet Tag on a Leather Collar or Nylon Collar”
Please specify font style when ordering (see pictures for font styles).
Font Style: Normal, Bold, Roman, Modern, Stretch, Script (typically used for initials). If you do not specify font style, “Bold” font is typically used used.
DO NOT SETTLE For cheap Engraving; Laser printing fades or rubs off over time and metal stamping distorts the metal causing the natural shape to change. Diamond tip engraving provides the highest quality engraving. Our PetProMart Permanent Diamond Tip Engraving is guaranteed to last for a lifetime! Our ID Tags can be personalized any way you like, this way, if you and your pet get separated, you can easily be contacted to retrieve your furry friend.
Features:
• Includes rivet set
• Custom Personalized Engraving
• Premium Aluminum Tag and rivets
• Made in USA
Package Includes:
1 each – Personalized Pet ID Tag
2 each – Compression Rivets (front and back)
Note: COLLAR NOT INCLUDED (SOLD SEPARATELY)
Size: 3/4″ x 2 3/4″
Material: Premium Aluminum
Style: Collar Rivet Tag
What contact info should I put on my Dog Tags?
keep in mind that the main purpose of a pet ID tag is to get your dog home safely if it gets lost.
Most folks that find your dog are going to want to call you. This means that including phone numbers is the most important thing you can do. I list every possible number that I have so that they will have multiple numbers to call in case I am not at my home phone.
On my dog tags, I have my cell phone number, my house phone number, and multiple office phone numbers. That way no matter where I am or when my dog is found, there will be someone there to answer the call.
Cell phone numbers are the best. After that, put your home, work, and any additional numbers that might help. Some examples would be your family, close friends, or fishing and hunting partners (anyone that might be around if your dog gets lost when you are not available).
The next most important information would be YOUR name, not your dog’s. Having your name on the tag will make it easier for the person calling to get the right person on the phone, especially if you list a work number. Having your dog’s name on the tag does more harm than good.
Many folks are not really aware of the number of dogs that get stolen every year. It’s pretty high. Having your dog’s name on the tag makes stealing your dog that much easier. It really doesn’t do the dog any good, nor does it help anyone that finds your lost dog. If they get close enough to read the tag, then they can call the number on it. At that point you can tell them the dog’s name if needed.
For folks like me that travel, I also want the City and State listed on the tag. This way if I lose a dog in San Francisco, CA and my tags says “Los Angeles, CA,” the person that finds my dog knows that this dog is lost and a long way from home.
After that, you can list your street address, but it is the least important line. Most folks are going to call. They may not have an easy way to get the dog back to you, and even if they do, they’ll need to make sure you are home before they come over.
How to Install the Rivet Tag on a Leather Collar or Nylon Collar:
1. Place the nameplate on the collar in the location you would like to install it.
2. Mark the nameplate rivet hole positions.
3. Punch holes in the collar where you made the nameplate hole marks with a hammer and punch, leather punch or drill. Use a durable surface during installation to prevent damages.
4. For nylon collars, you can use an ice pick; burn the edges of the holes to remove frayed strands.
5. Push the rivet posts through the holes in the collar from the backside of the collar.
6. Then push the rivet posts through your rivet-on nameplate and attach the provided rivet caps.
7. Tap the rivet caps onto the rivet posts with a hammer and punch until the caps flatten. Use a solid base to work on. If you don’t have a punch, try using the hammer to flatten the caps.
Note: We highly recommend purchasing a riveting punch and mandrel base setting tool for a professional installation. Rivet caps are 7mm.
| Font Style | Bold, Modern, Normal, Roman, Script, Stretch |
|---|---|
| Color | Black, Gunmetal Grey |


Reviews
There are no reviews yet.